DIY Feather Art
Pheasant Feather Art DIY Tutorial
This post contains affiliate links, that means should you make a purchase I may receive a small commission, your price stays the same. Thank you!
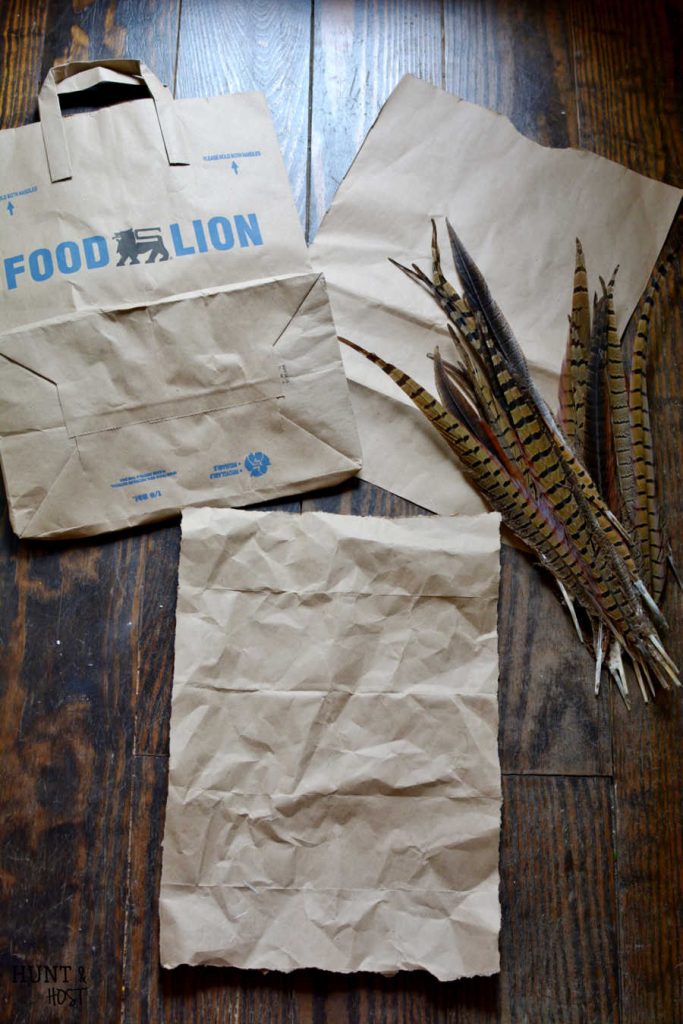
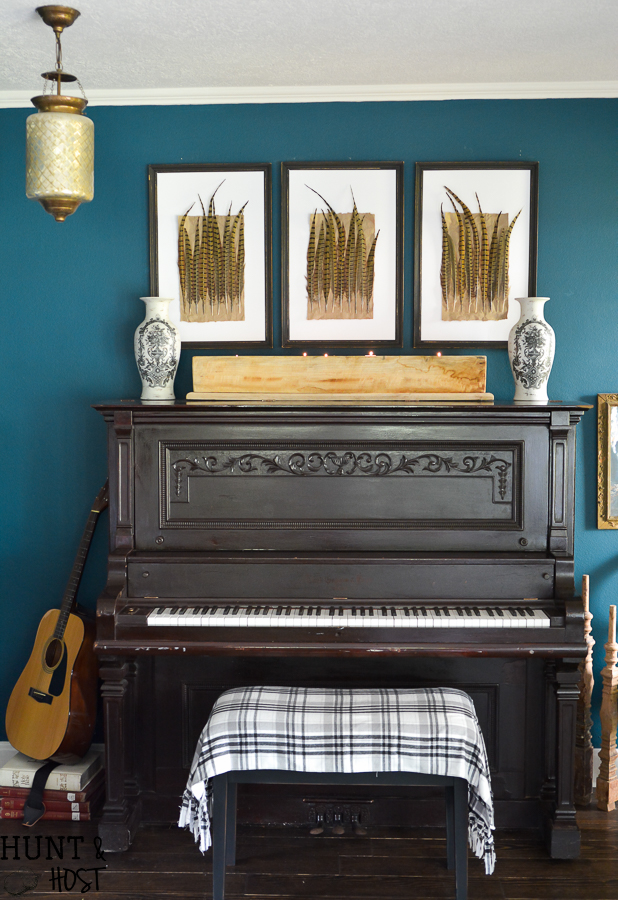
Sometimes I like to shop for ideas. Cruising through my favorite stores gathering up inspiration is refreshing to me. Often I get ideas for projects I’m stumped on. This project is a product of an inspirational walk through a local store I love. The large chalkboard that hung over our piano got moved to my daughter’s room because she REALLY wanted a big chalkboard and I didn’t want to make a new one. That left a huge blank space and me lacking any idea of what to hang up on this focal point. When I saw a picture in a local store my wheels began to turn. In the store I saw one small picture made with real pheasant feathers and I knew I happened to have a sack of pheasant feathers at home. Odd, I know but my dad goes pheasant hunting almost every year and my mom and I asked him to bring us some to craft with. (You can purchase feathers here if you don’t have a hunter handy 😉 )I’ve had a bag of them for a while now and they usually only show up in a fall arrangement or vignette. But not today!
 I just talked about my love of thrifted picture frames and I was lucky enough to score THREE matching frames a few weeks ago at a garage sale…for $1 each (plus a few other goodies)! I knew they would come in handy, it’s rare to find matching frames like this. They fit perfectly in the space above the piano too…it was clearly meant to be! They got a fresh coat of black paint for an update.

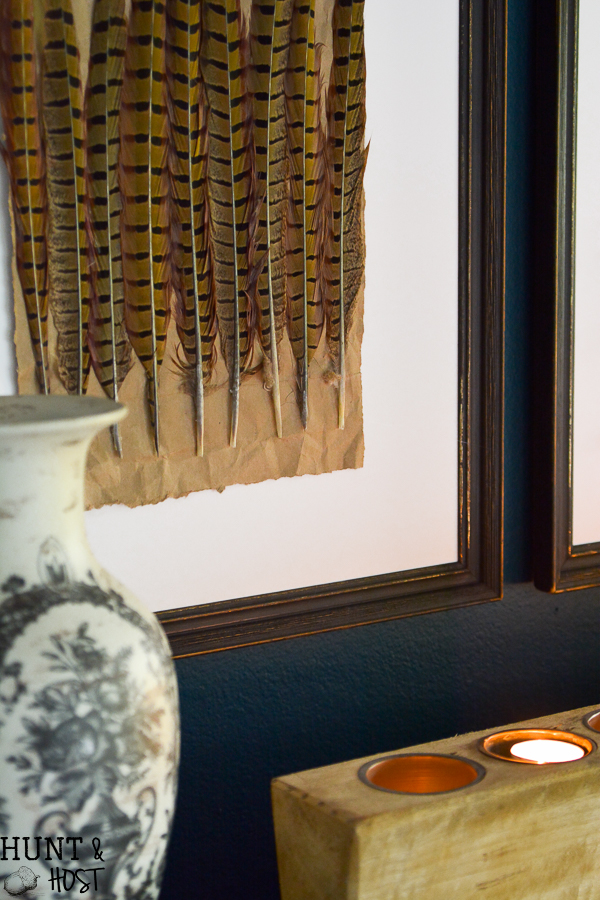
Anxious to bring my new artwork to life I rummaged around the house for supplies and a suitable background for this fine feather art. A stark white background was too harsh for me, it needed to be a touch softer. Enter paper grocery bags for the win. We have a small stack of paper sacks that we love, they are sturdy and have handles, we use them to tote things around, but I knew the texture and color was perfect. Brown paper bag is one of my favorites, is that weird?
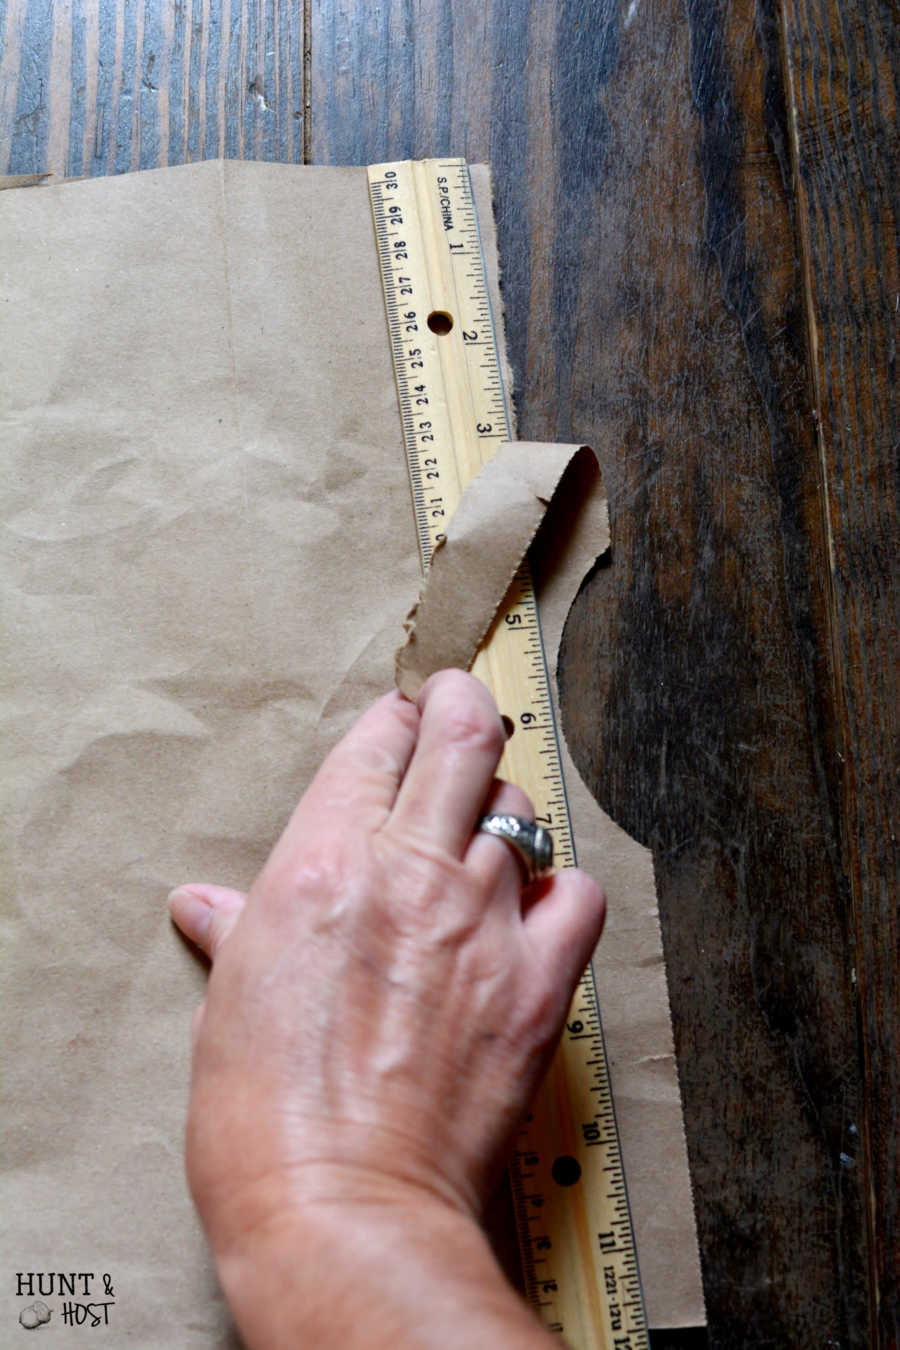
 I dismantled and cut up three paper bags in equal sizes. A ruler is a good thing to use to gently pull against for a soft torn edge, it will tear straight and neat (learned that from my scrapbooking!).
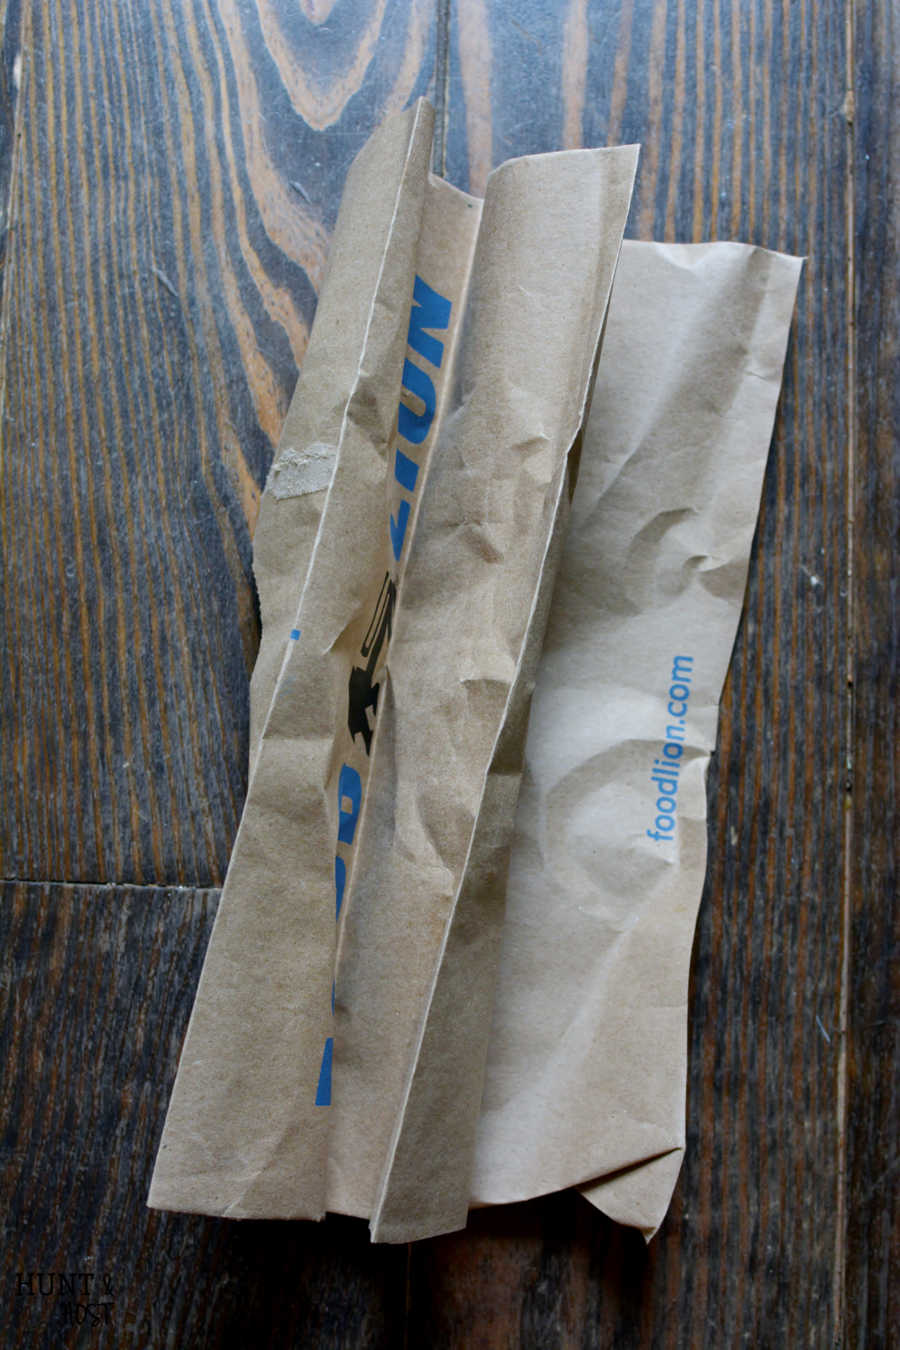
Because the sacks already had some heavily creased lines in them I went with it and made some more creases so it would look intentional. Then I crumbled up the paper for a raggedy worn look. Sometimes you just have to roll with what you’ve got and make it work!
Next, I sorted through the pheasant feathers and laid them out across the brown sack backdrop until I was happy with the fullness, height and direction. Jute string served as a plumb line.
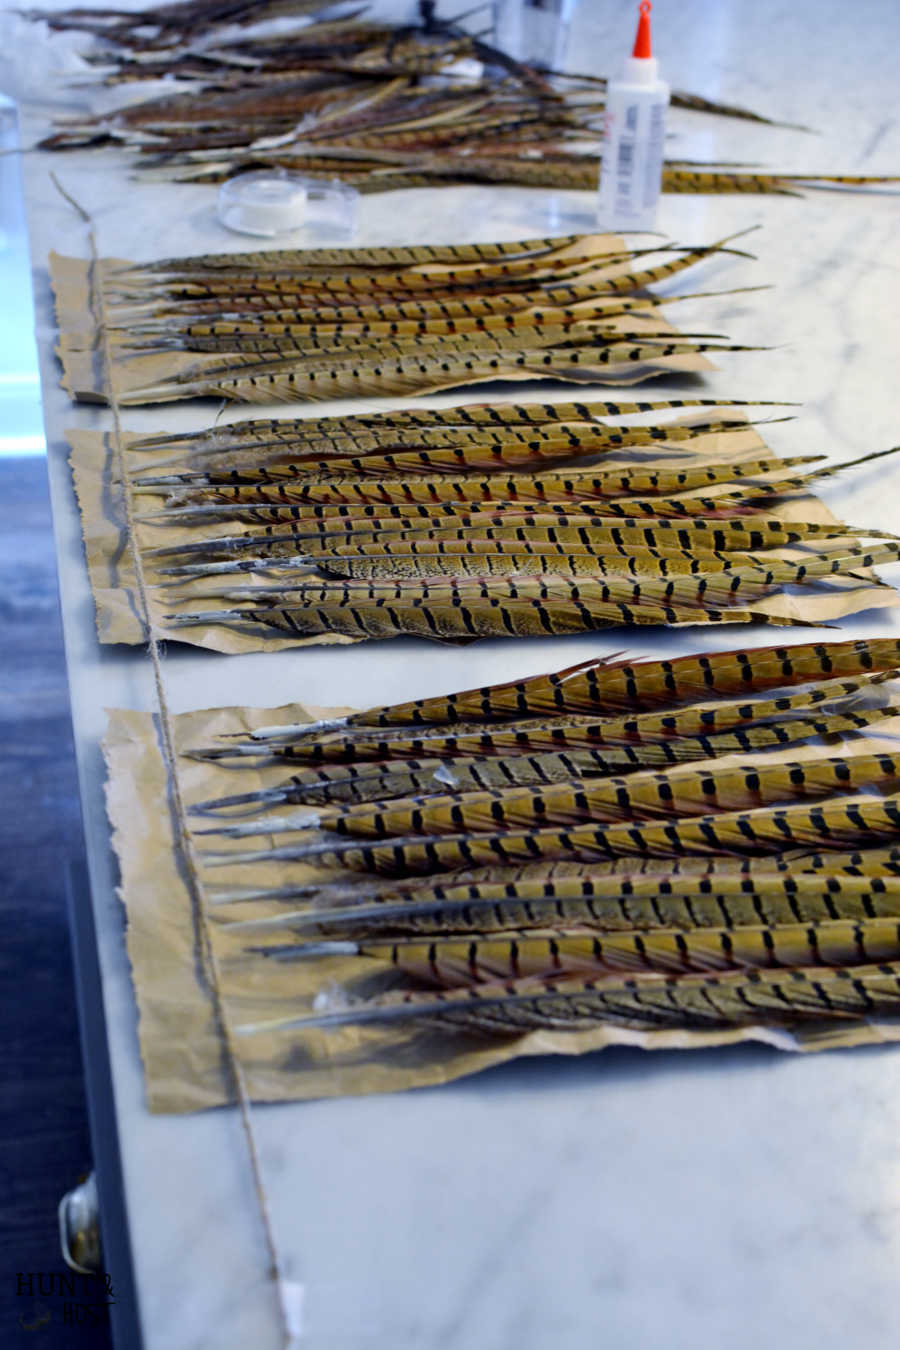 Glue is always a factor in a craft project, the right one will make or break your project. For this piece of artwork I used Fabric Glue (this one exactly). I know that sounds weird, but I find it works well on WAY more than fabric and this was one of those success stories. A soft line of glue on each feather’s spine was perfect, I held each feather in place with firm pressure for a minute to help it set. Once all the feathers were glued down I stacked heavy books on top on them for a few hours to allow the glue to dry completely and the feathers to adhere all the way up and down.
 For the white background I bought a large piece of foam board for a few dollars at the craft store and cut it to fit my frames. Once the feathers dried I glued the feather art piece to the white board, again with fabric glue and allowed to dry completely.
 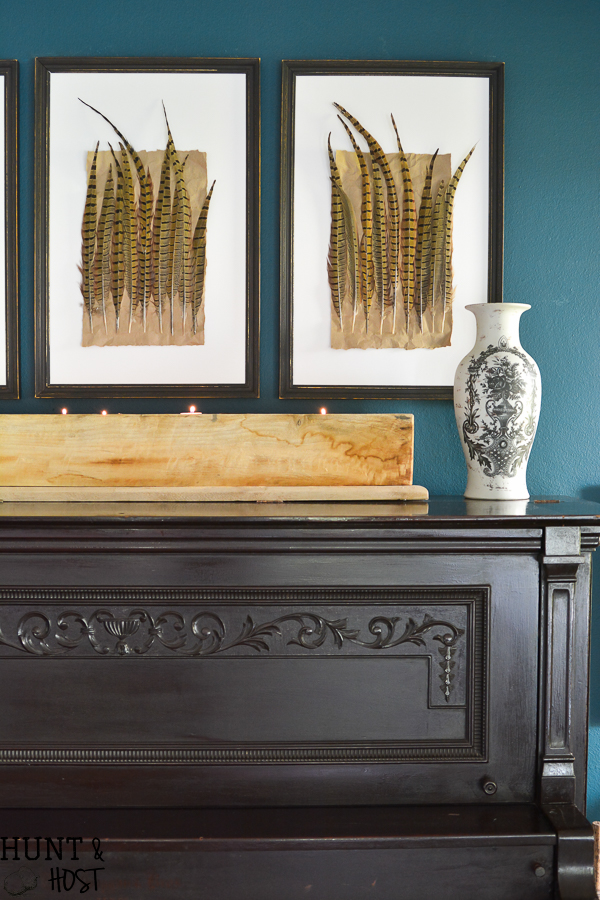 I secured the foam board in the frame with my framing point nailer. It’s a slightly expensive tool to have, but if you DIY a lot of artwork it comes in handy! You could order glass insets for your frames or leave the picture open, which is what I chose to do.
 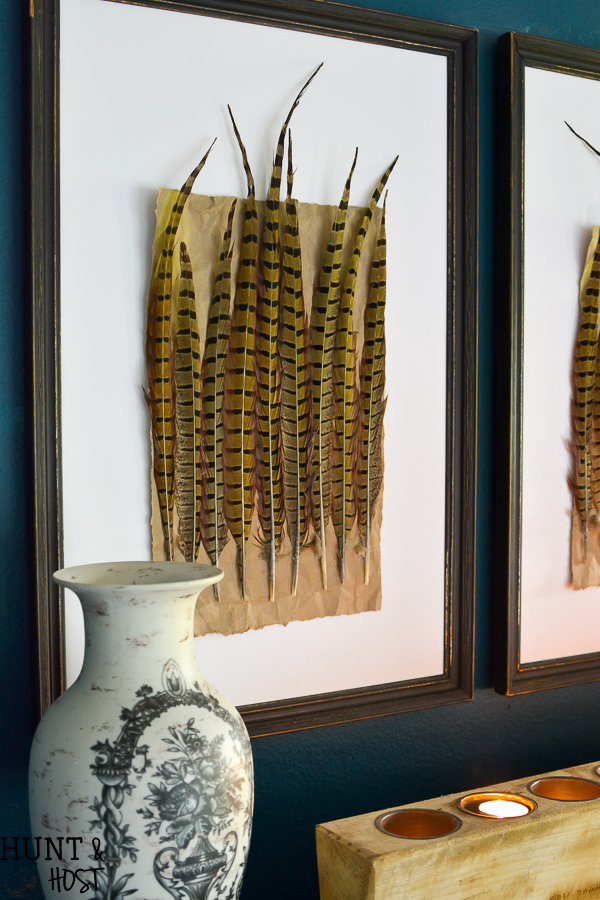 The gluing takes a bit of patience, but this feather art project is inexpensive and worth it if you ask me! You could try this with a variety of other feathers or found objects, get creative and decorate on a dime! What kind of feather would you use for this project? I’d love to hear your creative ideas! Stay tuned…the piano is getting a makeover shortly!

Kim, such a beautiful and unique piece of art!! Love it!!
Thank you – it was inspired by a piece in a store so I can’t take all the credit, but love to make stuff my own!
Very pretty
🙂 thank you!
Well that is very striking and kudos that it was a DIY! You asked about feather choices….another layer of shorter feathers (different coloring)could also be used. When I saw your wall color I thought that one peacock feather placed off center on the middle pic would be fun.
I always look forward to reading your posts and seeing what amazing things you create. Thank you for sharing the obvious gift God has given you.
Thank you Mandy! I thought of peacock feathers with my wall…they would definitely go! I love your idea of just one. So many options so little time, lol!
So simple and so lovely! I am curious, is the stool below the frames going to be a future project? It is wonderful!
Yes!!! coming soon!
Brown paper bags, packing material, etc is one of my fav craft materials..tear,cut into useable sizes…wad it up, really squeezing it, then I dip it it warm water, let it absorb it, bring it out and wad it up in your hand again..to wring out excess water…. Gently spread it out to dry…do not try to smooth the wrinkles. When dry, it can be painted/stained with a diluted acrylic wash in a color of your choice…shades of dark red, brown and it looks like leather.
WOW – I love new tricks, this sounds gorgeous, gonna have to give it a go.
Oh Kim, these are amazing! They look like VERY expensive pieces of art! I am sharing these on /fB and pinning, people need to see this amazing idea!
thank you Chloe, I got the idea from expensive art, and did my own take on it because I never would have bought one, much less three!
Super cute kim! Love it over that piano
Thanks Deb – easy art 🙂
What a fun idea! LOVE it!
thanks, it was a pretty easy project, especially for the impact!
Kim!!! Oh my goodness this is so beautiful! Pinning!!!!!
thanks friend, so glad you like it!
Thanks for sharing, it´s soooooo beautifull!!
thanks, so glad you like it!
Excellent!! Love it!
thank you Karen!
I love this! What brand of fabric glue did you use?
Fabri-tac is my favorite!
I love the look of the wrinkled paper, but if you had wanted a flatter look or to get rid of the creases…..just iron the bags. I do it all the time since I reuse the paper bags for making patterns for costumes.
I have ironed paper before too and it really helps! thanks for the tip!!!
This is great! If I wanted to add glass, would that smash the feathers ? Would you recommend a different type of frame if glass is added?
I think you could add glass, it would smush it a little but probably not too bad. There are frames available that have a thick mat, or spacer between the glass and the picture that might be better, if you can find one of those!
Hi! Brand new here. Love the entire look!
Can you share the paint color that’s on your wall? Teal? Lovely!!
Welcome! This was in our old house and all the paint colors from that home are here: https://salvagedliving.com/whole-house-paint-colors/
Beautiful! I’m going to try to recreate this with pheasant feathers from my recent hunting trip. Do you happen to have the dimensions of the picture frames? Thanks!
My frames are 15 X 23 but you can make what you have work!
Love the framed feather idea. I have turkey feathers from a friend that I plucked from the wings and cleaned. Will be using your idea! Thanks, Alma
that will be beautiful!
I just saw the last comment who used Turkey feathers which is what I will be using. My dog chewed up our Turkey tail piece so I’m taking the good feathers to make this along with my baby girl’s initials to put over the bottom of the feathers! So glad I found this!
What is approximate length of your feathers. I bought some and they seemed too small.
Mine were roughly 12-15 inches but I also made one with much smaller feathers as well. It just depends on the space you want to hang the picture. Get a frame that works with your feather size and you will be good to go!