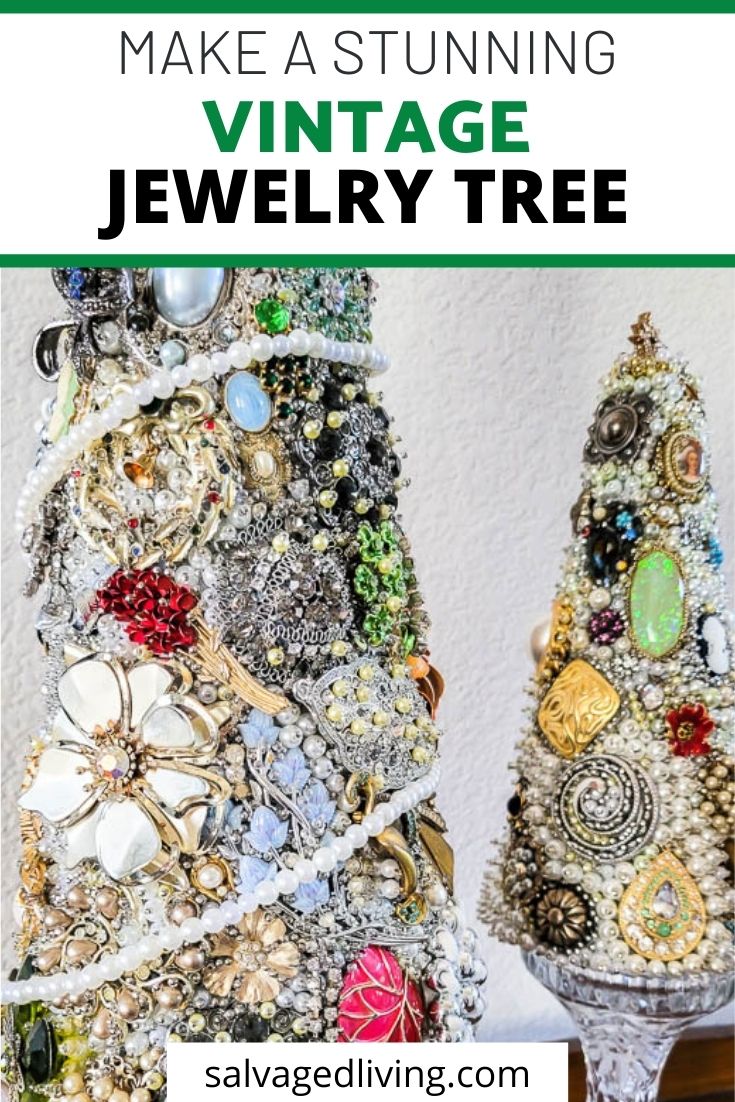
How To Make A Beautiful DIY Vintage Jewelry Tree Tutorial
This DIY Vintage Jewelry Tree Tutorial is such a fun and unique craft idea. You can use favorite jewelry pieces that you want to display, or pick up inexpensive finds at thrift stores, or yard sales.
SUPPLIES NEEDED FOR DIY VINTAGE JEWELRY TREE
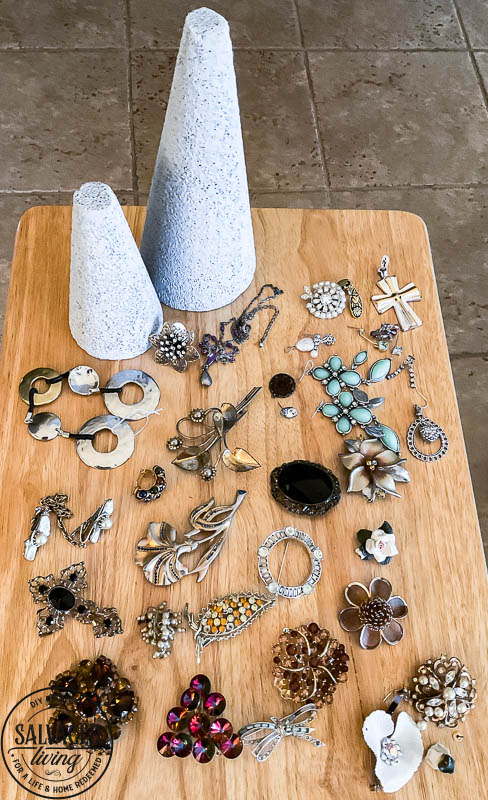
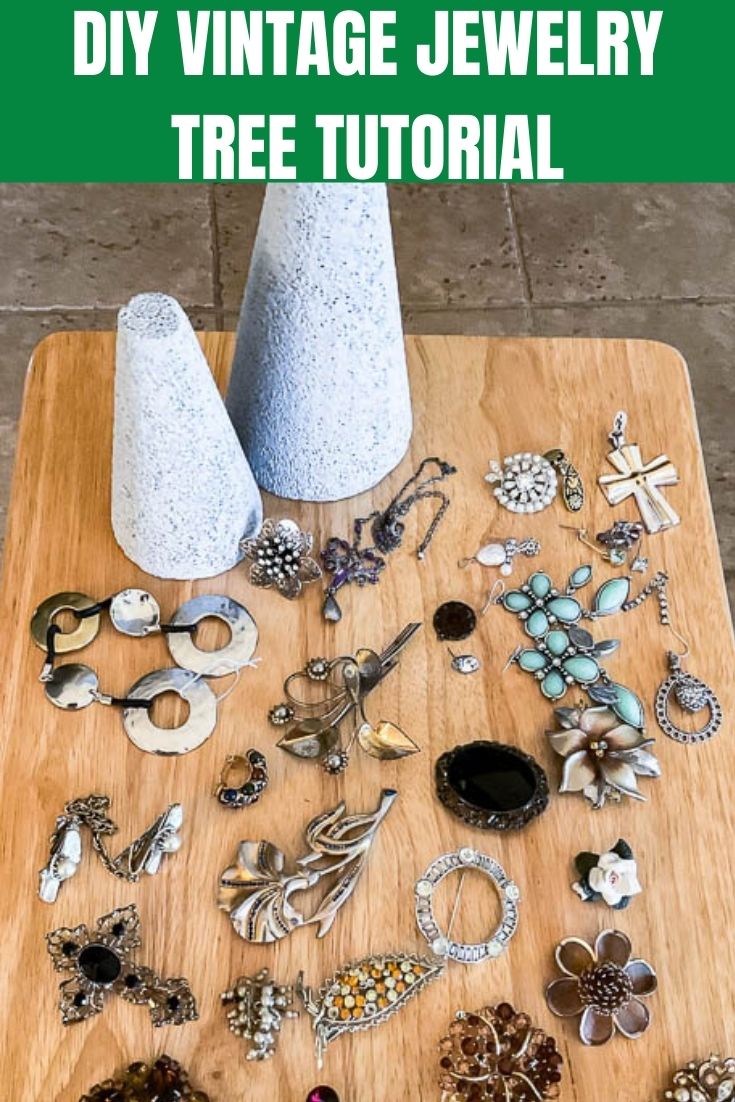
- Styrofoam Tree – please note you can make ANY shape! Eggs, balls, etc.
- Jewelry- any kind, rings, bracelets, necklaces, pins, earrings
- Dressmaker Pins – I buy the boxes of 750 Dritz pins
- Extra Long Pins
- Elmer’s Glue
- Paint Sponge
- Paint – to coordinate with your jewelry
- Seed Beads – lots of e-beads and seed beads. You can really use any size you like.

how to make a DIY VINTAGE JEWELRY TREE
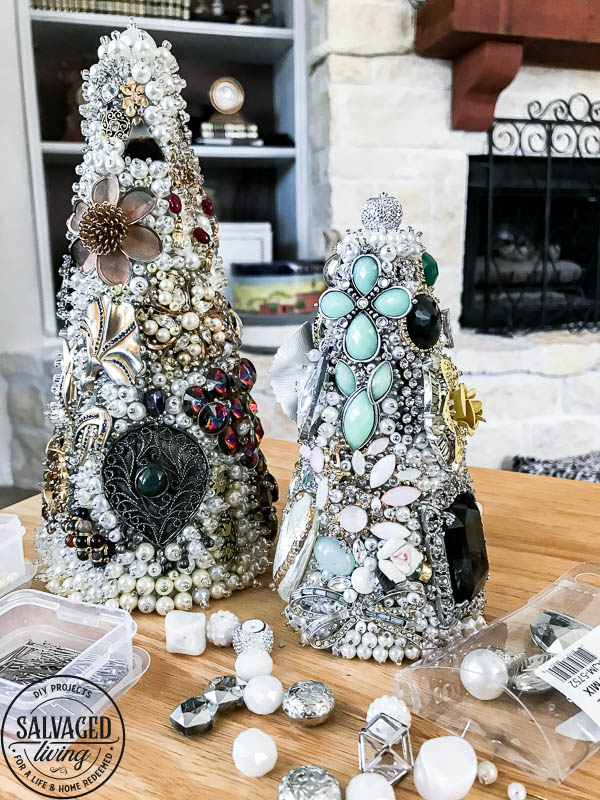
First, cover your tree with glue using your sponge. When completely dry, you want to paint your tree using a color that enhances your jewelry. Don’t forget, you can use any shape Styrofoam to make these beauties, you are not limited to the tree shape! Have fun with them.
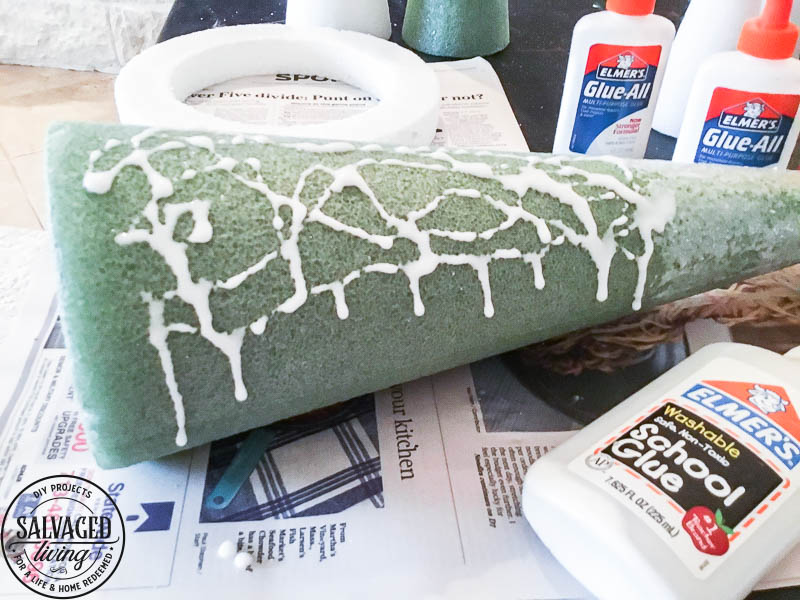
I used a silver gray for my pearl trees. It’s best to use a neutral color, as you really want your jewelry to be the star of the show. You don’t want the paint color to distract from all that beautiful bling!
Next, the fun part!
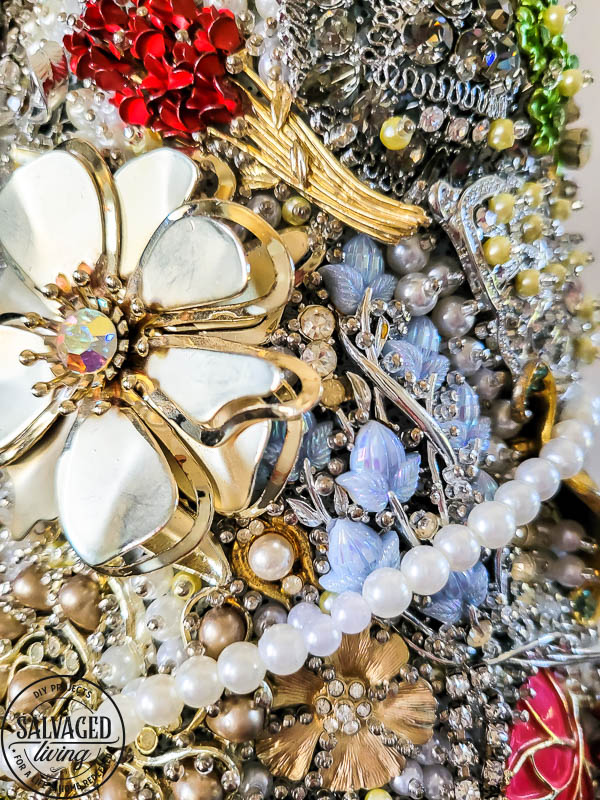
Start pinning your pieces into the styrofoam. I will say that the closer you put them together, the less bead pinning you will have to do.

You can just place pieces abstractly or in a pattern or just wherever you want. It really doesn’t matter because it will look beautiful anyway you do it!

Be sure to secure each piece either with extra pins, or wire if need be.
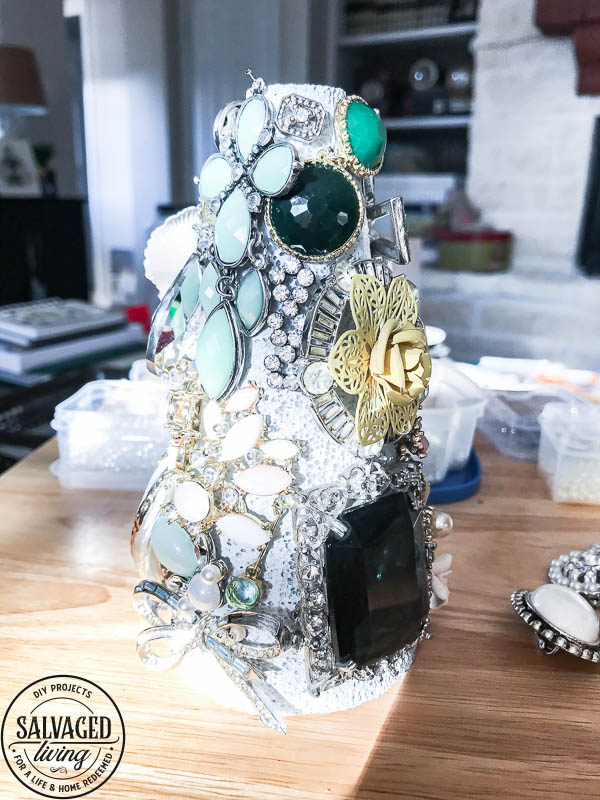
When all your jewelry is secure, it’s time to start beading.
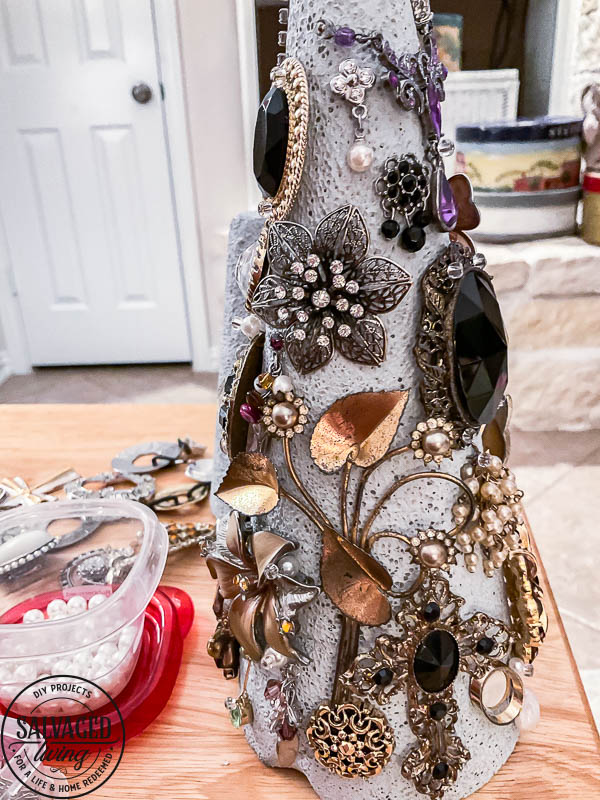
Be sure to place an e-bead, then a seed bead on the pin, and just pin as close to each other as possible. Sometimes you will need to stack more than one bead on your pin because your jewelry piece stands out.
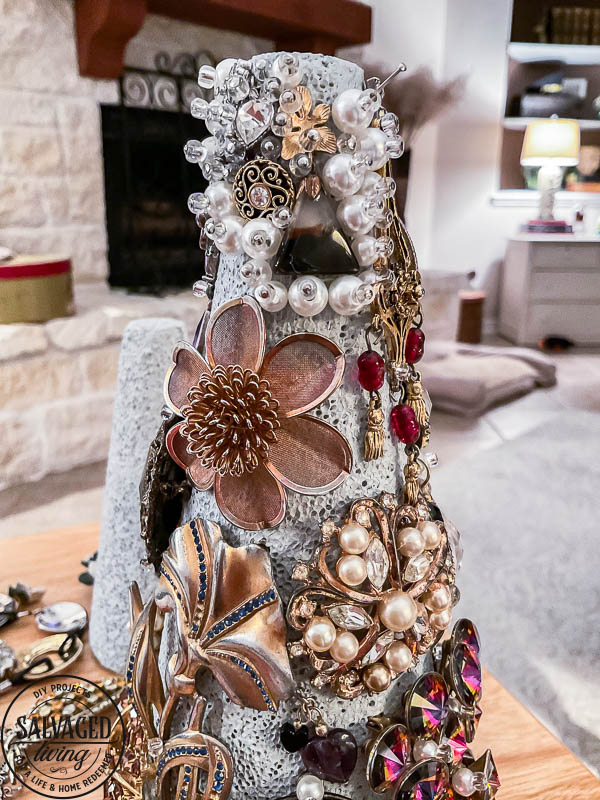
Just keep pinning! I chose to use pearl beads for my trees but you can use whatever you like.
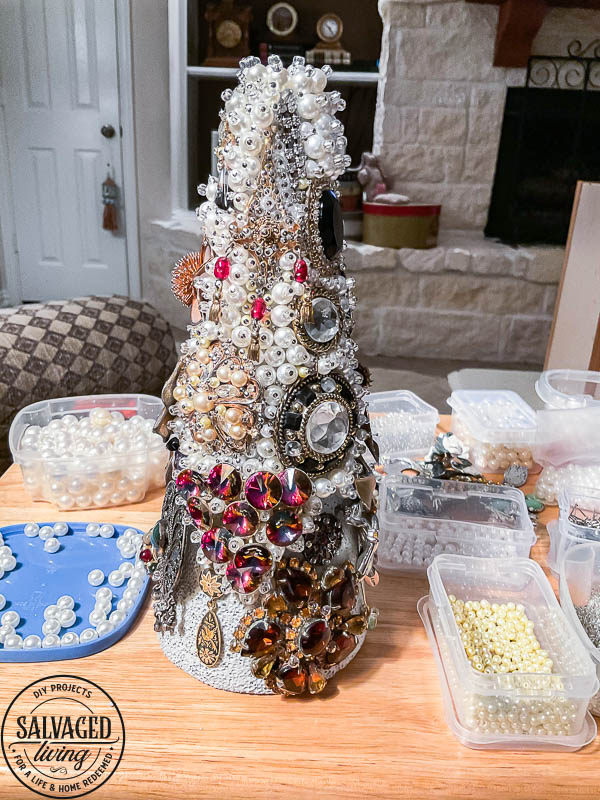
I will also use just one color seed beads throughout so the jewelry pieces are the show! You definitely don’t want to take away from the main jewelry pieces.
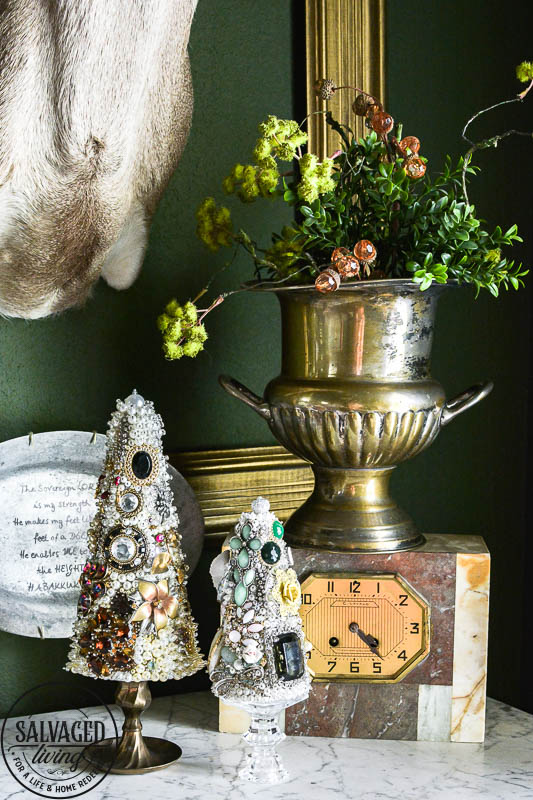
LOOK HOW GORGEOUS…
To display your trees, you might try candle holders. You can find tons of them at the thrift stores. The main thing is to have fun with this craft. Have a few of your friends over and you can each make a tree or two.
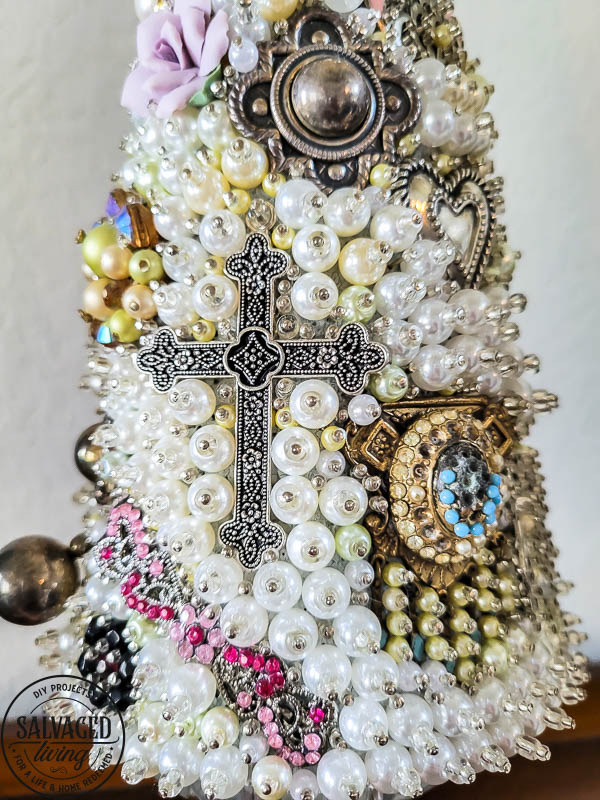
I couldn’t resist sharing a few close ups of these gorgeous trees. They are even prettier in person!
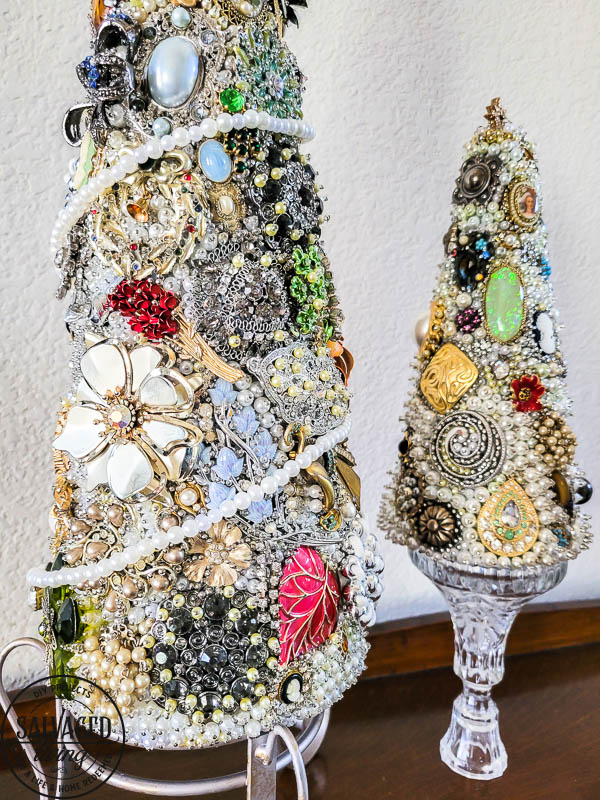
Display them on a bookshelf, or a nightstand. This would also make a thoughtful memorial tree filled with costume jewelry from a loved one. Instead of leaving them in a box, put them on display so you can enjoy them.
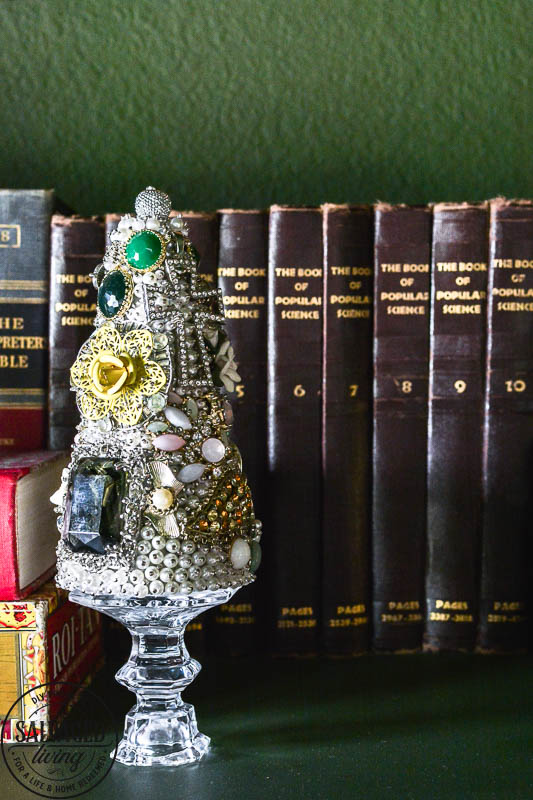
You can make a few to place on a mantel, or line a buffet. The possibilities are endless.

If you liked this DIY vintage jewelry tree tutorial, you may also like these vintage DIY ideas:
Modern Vintage Wood Box Makeover
[mv_create key=”49″ thumbnail=”https://kimpepperblog.com/wp-content/uploads/2021/05/how-to-make-vintage-brooch-tree-tutorial-1.jpg” title=”Vintage Jewelry Tree Tutorial” type=”diy”]

Kim, these jewelry trees are just beautiful. Thank you for sharing.
I am so glad you like them Felicia – they are treasures!!
Are the seed beads clear?
you can use clear or colored! your preference
I love these jeweled trees. So gorgeous. Thank you. Blessings to you.
ank you Debbie – hope you get to try your hand at them!
what is the purpose of the glue? the finished tree is a treasure.
it helps the pins stick better, it is tacky and adds texture for the pins to hang on. thank you!
Kim these jewelry trees are beautiful, I have always wanted to do this but never knew how to start & felt a little intimidated. Your instructions were so helpful & I am looking forward to trying to make one. Thank you
yay – so glad they helped, this is my mom’s project, she has way more patience for this kind of thing! Enjoy!
Could I use spray paint instead of sponging paint on?
I don’t see why not!
How do pin jewelry on? There’s nothing to stick a pin into.
It sticks into the styrofoam base.
Sorry i wasnt very clear . I meant what if the piece of jewelry has nothing that i can put a pin into like a clasp etc. To hold it to the styrofoam
You will need to pin through an opening in the design or very closely around the edge to hold it in place, make sure your pins have a small head on them to hold the jewelry!
What is an e-bead?
It is a tiny bead you thread onto the pin before sticking it in a piece of jewelry or larger bead. If you look in the supply section above, click on seed bead and you will see an example! Hope that helps
What are e-beads?
the small beads you see that hold the sequin and things in place
Can you use modge podge instead of Elmer’s glue?
Couldn’t you glue on the jewelry pieces instead of pinning them?
you could, but part of the charm is that you can add small seed beads and mix them into spaces in the pins if ther are any – it’s definitely a personal choice!
Do you remove the pins, etc., from back of jewelry before putting on tree?
no – use those to stick the pin into the foam!
That’s a great tutorial, thank you so much!
Is there a way to make it more secure – have you put a layer of modge podge over the final creation? That way things don’t move or fall out?
I don’t think you would want to do that – it would change the jewelry finish, but you could possibly add glue to each pin as you stuck it in, that might help?
I have used liquid glass on the finished products of my trees. It seals the jewelry and pins and is clear as glass.